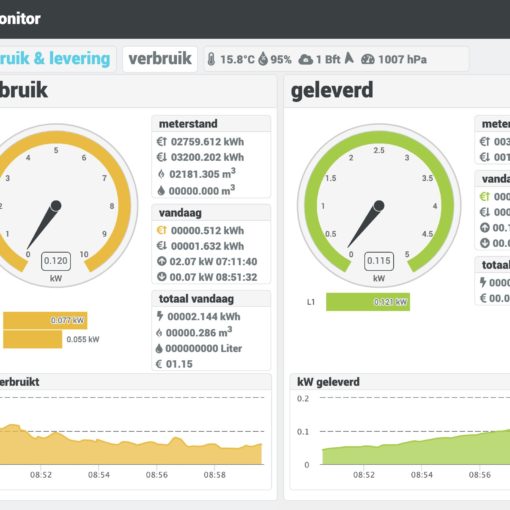
Running the P1monitor container in a Kubernetes environment requires some additional configuration steps. Some things to think about are:
- Access to serial ports is not as easy as in e.g. docker
- Your container needs to be scheduled on the correct node
- Access to data may be more difficult
Access to serial ports
In a Kubernetes/K8s environment access to serial ports on the node is more difficult. There is not a direct option (such as devices in docker compose files) to get direct access to a serial port on the host/node.To fix this multiple options are available
Provide privileged access
When you provide privileged access to your pod the container has access to the node devices such as the serial port. Providing privileged access is from a security point of view not the best solution though. It allows not only access to your serial port but also to all other devices. This solution also requires that the pod is always scheduled on the same node as your serial port is also connected to a fixed node.
Schedule Pod on the right node
As mentioned above, when using the privileged option to allow access to your serial port you will need to make sure your p1monitor pod gets scheduled on the right node. The parameter nodeName may help you doing that by specifying the hostname of the node. Other options are available too
Serial to network proxy
Another option to access the serial port is by using a serial to network proxy. Your local serial port on the node will be accessible via an network connection such as socat. Advantage is that you do not need privileged access on the node and that node scheduling is not required anymore. In latter case data must be loaded on shared storage of course.
Access to data
Access to data files needs more configuration on Kubernetes variants. In case of the privileged pod option local host data must be accessible. In case of serial to network proxy shared storage must be accessible.
Configuration using privileged access and local data files
When creating the pod using straight forward privileged access to the node the following configuration can be used. Note that the Security Context is set to privileged. Data is stored on the local node in /home/user/k3s/p1mon/alldata/ and the ramdisk is in memory. To ensure the pod will be scheduled on the right node the nodeName is used to schedule the pod on node with hostname node-with-serial-access
---
apiVersion: apps/v1
kind: StatefulSet
metadata:
  name: p1monitor
  labels:
    app: p1monitor
  namespace: p1monitor
spec:
  nodeName: node-with-serial-access
  replicas: 1
  selector:
    matchLabels:
      app: p1monitor
  template:
    metadata:
      labels:
        app: p1monitor
    spec:
      containers:
        - name: p1monitor
          securityContext:
            privileged: true
#          env:
#            - name: PROXYPATH
#              value: "power"
#            - name: CRONTAB
#              value: "/p1mon/data/crontab.txt"
#            - SOCAT_CONF
#.             value: '"-T60 pty,link=/dev/ttyUSB1,rawer,group-late=dialout,mode=660 tcp:192.168.10.10:5523,forever,interval=30"'
          image: mclaassen/p1mon
          imagePullPolicy: Always
          ports:
            - containerPort: 80
              protocol: TCP
          resources: {}
          volumeMounts:
             - mountPath: /p1mon/data
               name: p1monitor-data
             - mountPath: /p1mon/mnt/usb
               name: p1monitor-usbdisk
             - mountPath: /var/log/p1monitor
               name: p1monitor-log
             - mountPath: /run
               name: p1monitor-run
             - mountPath: /tmp
               name: p1monitor-tmp
             - mountPath: /p1mon/mnt/ramdisk
               name: p1monitor-ramdisk
      terminationGracePeriodSeconds: 60
      restartPolicy: Always
      volumes:
        - hostPath:
            path: /home/user/k3s/p1mon/alldata/data
          name: p1monitor-data
        - hostPath:
            path: /home/user/k3s/p1mon/alldata/usbdisk
          name: p1monitor-usbdisk
        - hostPath:
            path: /home/user/k3s/p1mon/alldata/log
          name: p1monitor-log
        - emptyDir:
            medium: Memory
          name: p1monitor-run
        - emptyDir:
            medium: Memory
          name: p1monitor-tmp
        - emptyDir:
            medium: Memory
          name: p1monitor-ramdisk
---
apiVersion: v1
kind: Service
metadata:
  name: p1monitor
  labels:
    app: p1monitor
  namespace: p1monitor
spec:
  selector:
    app: p1monitor
  type: NodePort
  externalIPs:
  - 192.168.10.10
  ports:
   - port: 8081
     targetPort: 80
Install ser2net serial to network proxy
To use the serial to network option in P1Monitor the ser2net utility needs to be installed. The below ser2net.yaml should be adjusted to the physical serial parameters connected to your smart meter.
sudo apt install ser2net

# Modify /etc/ser2net.yaml
sudo vi /etc/ser2net.yaml

# Add serial config
connection: &ttyUSB1
    accepter: tcp,5523
    enable: on
    connector: serialdev,
              /dev/ttyUSB0,
              115200n81,local
Configuration using serial to network proxy nfs data files
When creating the pod using a serial to network proxy in combination with an nfs network share use following configuration. Note that the Security Context is not needed anymore. Data is stored on the nfs share in /mnt/nfs/p1mon/alldata/ and the ramdisk is in memory. Socat information is configured via the SOCAT_CONF environment variable.
The SOCAT_CONF parameter as below will create a device /dev/ttyUSB1 in the container which does not require any additional configuration in the P1monitor GUI anymore.
---
apiVersion: apps/v1
kind: StatefulSet
metadata:
  name: p1monitor
  labels:
    app: p1monitor
  namespace: p1monitor
spec:
#  nodeName: node-with-serial-access
  replicas: 1
  selector:
    matchLabels:
      app: p1monitor
  template:
    metadata:
      labels:
        app: p1monitor
    spec:
      containers:
        - name: p1monitor
#          securityContext:
#            privileged: true
          env:
#            - name: PROXYPATH
#              value: "power"
#            - name: CRONTAB
#              value: "/p1mon/data/crontab.txt"
            - SOCAT_CONF
.             value: '"-T60 pty,link=/dev/ttyUSB1,rawer,group-late=dialout,mode=660 tcp:192.168.10.10:5523,forever,interval=30"'
          image: mclaassen/p1mon
          imagePullPolicy: Always
          ports:
            - containerPort: 80
              protocol: TCP
          resources: {}
          volumeMounts:
             - mountPath: /p1mon/data
               name: p1monitor-data
             - mountPath: /p1mon/mnt/usb
               name: p1monitor-usbdisk
             - mountPath: /var/log/p1monitor
               name: p1monitor-log
             - mountPath: /run
               name: p1monitor-run
             - mountPath: /tmp
               name: p1monitor-tmp
             - mountPath: /p1mon/mnt/ramdisk
               name: p1monitor-ramdisk
      terminationGracePeriodSeconds: 60
      restartPolicy: Always
      volumes:
        - name: p1monitor-data
          nfs:
            server: <nfs-server>
            path: /mnt/nfs/p1mon/alldata/data
        - name: p1monitor-usbdisk
          nfs:
            server: <nfs-server>
            path: /mnt/nfs/p1mon/alldata/usbdisk
        - name: p1monitor-log
          nfs:
            server: <nfs-server>
            path: /mnt/nfs/p1mon/alldata/log
        - emptyDir:
            medium: Memory
          name: p1monitor-run
        - emptyDir:
            medium: Memory
          name: p1monitor-tmp
        - emptyDir:
            medium: Memory
          name: p1monitor-ramdisk
---
apiVersion: v1
kind: Service
metadata:
  name: p1monitor
  labels:
    app: p1monitor
  namespace: p1monitor
spec:
  selector:
    app: p1monitor
  type: NodePort
  externalIPs:
  - 192.168.10.10
  ports:
   - port: 8081
targetPort: 80 


2 gedachten over “Running P1-Monitor in a Kubernetes environment”
2.4.0d has an issue with MQTT connect upgraded to version 2.0?
Indeed noticed a change in the MQTT protocol using newer libraries. Created version 2.4.0e (not pushed to latest yet) so please check if that fixes the issue for now